
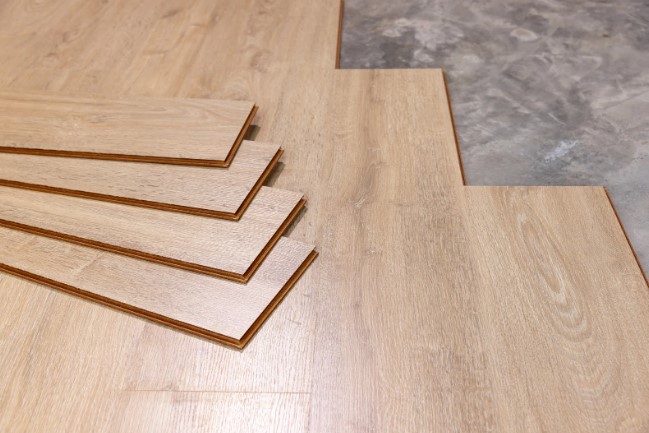
Tile Installation Basics: Materials, Preparation, and Planning
- Essential Tile Materials for Durable Results in Tampa Homes
- Subfloor Preparation and Planning: Laying the Groundwork for Flawless Tile Work
- Assessing and Preparing the Subfloor
- Moisture Control
- Layout Planning and Dry Fitting
- Gathering the Right Materials
- Step-by-Step Tile Installation Process: Best Practices for Tampa Bay Renovations
- Common Challenges in Tile Installation and How to Prevent Them
- Elevating Tampa Home Renovations with Quality Tilework
Choosing the right foundation for your floors transforms any Tampa, FL home renovation project from routine to remarkable. Beyond visual appeal, the proper approach ensures durability and lasting value in Florida’s unique climate. Homeowners looking to upgrade kitchens, bathrooms, entryways, or living spaces often consider TAMPA BAY FLOORS tile installation as a reliable method that combines design flexibility with resilient performance. Selecting the right materials, understanding the essential steps in preparing the subfloor, and planning every phase help avoid common pitfalls and unnecessary expenses. Whether refreshing a single room or planning a full-scale remodel, a thoughtful, informed approach to tilework is the surest route to a flawless result.
Essential Tile Materials for Durable Results in Tampa Homes
Selecting tile isn’t merely a matter of color, pattern, or size. The choice of material directly affects performance and longevity, especially in humid, high-traffic environments typical in the Tampa region. Understanding the primary materials available helps homeowners make confident, lasting decisions for their renovation projects.
Ceramic tile is popular for its affordability, broad style range, and suitability for walls, backsplashes, and low-traffic floors. It resists stains and moisture moderately well, though it is softer than other tile types and can chip under impact.
Porcelain tile is fired at higher temperatures, making it denser, harder, and more water-resistant than ceramic. Its durability makes it ideal for bathroom floors, kitchens, and outdoor spaces, especially in areas exposed to sudden humidity changes or spills.
Natural stone tile–including travertine, slate, marble, and granite–delivers unmatched texture and character. Stone tiles are best reserved for spaces where their porous nature and unique veining can be properly showcased and maintained. Stone requires sealing and more careful upkeep but rewards with elegance and a timeless effect.
Glass tile brings brilliant color and light reflection to backsplashes, shower walls, and accent strips. While not commonly used for flooring due to slipperiness, it excels where impact is minimal and visual drama is desired.
Cement tile offers limitless patterns and a handcrafted look, making a statement in entryways and kitchens. It demands sealing and periodic maintenance but delivers warmth and artisan charm unmatched by mass-produced tiles.
Grout selection also plays a crucial role. Epoxy grout provides exceptional stain resistance and longevity, while cementitious grout is more forgiving to work with but requires sealing to block moisture intrusion.
With each material, consider the specific demands of the installation location: levels of foot traffic, sunlight exposure, and temperature swings. Tampa’s climate, with its humidity and salt air, favors materials and grouts proven to withstand moisture and minimize expansion or contraction. For outdoor areas, select frost-resistant, slip-resistant options to maximize safety and minimize maintenance.
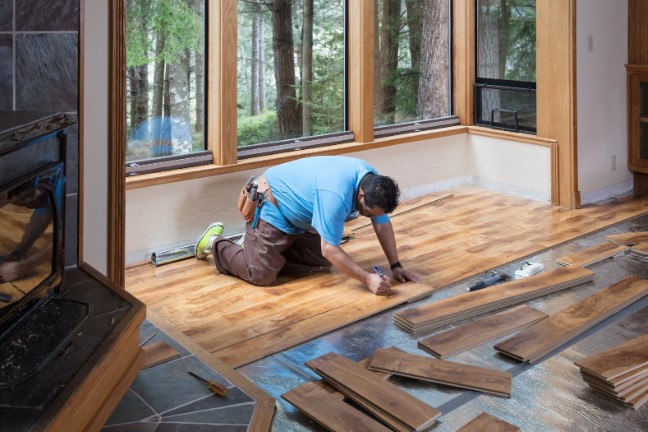
Subfloor Preparation and Planning: Laying the Groundwork for Flawless Tile Work
Delivering a flawless tile job starts well before the first tile is set. It requires meticulous attention to subfloor condition, precise measurements, and organized planning. These steps ensure that tile lays flat, adheres securely, and performs as designed for years in Tampa homes.
Assessing and Preparing the Subfloor
Inspection is critical. For concrete subfloors, check for cracks, unevenness, or residual moisture. Use a straightedge or laser level to identify dips or humps exceeding 1/8 inch over six feet–these must be corrected with self-leveling compound or patching products.
Wood subfloors should be sturdy, well-screwed, and free of flex. Install underlayment such as cement board or uncoupling membranes to provide a solid, moisture-resistant base. Avoid direct tile installation on plywood, as movement can cause cracking.
Moisture Control
In Tampa’s humid climate, moisture infiltration is a serious risk. Apply a suitable waterproofing membrane to bathrooms, laundry rooms, or slab-on-grade areas. This extra layer prevents tile and grout damage from vapor transmission or water leaks.
Layout Planning and Dry Fitting
Successful tile installation demands careful layout to minimize awkward cuts and maximize symmetry. Measure the room, find the center point, and use a chalk line to define a starting axis. Dry-fit tiles along reference lines to visualize the pattern and assess the need for partial tiles along edges and corners. Pay special attention to doorway transitions and built-in cabinetry lines.
Gathering the Right Materials
Stock up on high-quality thinset mortar, trowels of the correct notch size, tile spacers, and a precise tile cutter or wet saw. Plan for at least 10% overage to allow for breakage, pattern matching, and future repairs.
A successful job also depends on environmental considerations: keep the installation area between 50°F and 90°F, and avoid tiling during extreme humidity swings if possible. This helps adhesives cure properly and prevents tiles from shifting during set-up.
When Tampa residents require efficient, reliable guidance, TAMPA BAY FLOORS flooring service near me offers comprehensive support, from initial material selection to post-installation maintenance tips.
Step-by-Step Tile Installation Process: Best Practices for Tampa Bay Renovations
A seamless tile floor or wall depends on following each step in the proper sequence, with attention to detail at every phase. TAMPA BAY FLOORS https://www.tampabayfloors.us/services/tile provides support and resources to guide homeowners through the full journey.
Here’s a practical checklist to ensure every stage of the tile installation process is handled correctly:
-
Surface Preparation
- Verify the subfloor or wall is clean, smooth, and properly primed.
- Address any cracks, holes, or moisture problems before proceeding.
-
Dry Layout
- Lay out tiles without adhesive to confirm alignment and plan for minimal, balanced cuts at edges.
-
Mixing Thinset
- Prepare thinset mortar to the manufacturer’s recommendations, using clean water and mixed until lump-free.
-
Troweling and Setting
- Apply thinset with the appropriate notched trowel, working in manageable sections.
- Set tiles firmly, using spacers for even joints and maintaining pattern accuracy.
-
Cutting Tiles
- Use a wet saw or snap cutter to achieve precise edge fits, especially around fixtures or doorways.
-
Grouting
- Allow the thinset to cure fully (usually 24 hours), then remove spacers and apply grout with a rubber float.
- Wipe excess grout promptly, and clean tile surfaces as grout sets.
-
Sealing and Curing
- For natural stone or cement tiles, apply a penetrating sealer to protect against stains and moisture.
- Wait the recommended time before walking on or cleaning the new surface.
Proper adherence to each step reduces the risk of future failures, from cracking tiles to unsightly grout lines or trapped moisture. Attention to detail at every stage distinguishes a professional-quality installation from an amateur one.
Common Challenges in Tile Installation and How to Prevent Them
Tampa homeowners occasionally encounter specific obstacles when tiling, but most issues are avoidable with thoughtful planning and execution. Uneven subfloors are a leading culprit behind cracked tiles and uneven grout lines. Rushing through surface checks or skipping a leveling compound leaves permanent flaws that only worsen with time.
Improper adhesive mixing or using the wrong trowel size leads to weak bonds, hollow-sounding tiles, or lifting over time. Always mix thinset or mastic strictly according to the manufacturer’s directions and match notch size to tile dimensions. Leaving insufficient spacing between tiles–or laying them too tightly–prevents grout from forming a solid barrier against water ingress, compromising longevity.
In high-moisture Tampa environments, neglecting waterproofing membranes or sealers allows mold growth, tile discoloration, and substrate damage. Invest time in proper moisture protection, especially in wet zones. Finally, avoid walking on freshly set tiles until mortar and grout have fully cured to prevent shifting and unevenness.
By anticipating these challenges and addressing them proactively, Tampa residents can enjoy visually stunning, long-lasting tile floors and walls that withstand the demands of everyday life.
Elevating Tampa Home Renovations with Quality Tilework
Successful tile installation in Tampa, FL requires careful material selection, stringent preparation, and adherence to best practices. Each detail, from subfloor leveling to grout sealing, contributes to a beautiful, resilient result that elevates home value and interior comfort.